Such a beautiful sunset. It was a scorcher today...I was out and about in 91 degree temperatures and we don't have air conditioning around here.
Thursday, March 31, 2011
Sunday, March 13, 2011
Look for Inspiration EVERYWHERE and ANYWHERE
I have admired these camellias (one of my favorite flowers - I need to get one for my yard renovation) for over two years now. They're in big pots at my bank and I see them every time I'm there. I happened to have my camera today and there wasn't anyone at the bank, so now I have pictures of these gorgeous flowers.
Thursday, March 03, 2011
Oh, so tiny baskets

Shrink Plastic Baskets
I made these shrink plastic baskets ages ago - I think it's time to update them, so check back to see 'modern' versions. They're perfect for favors or gifts - fill them with candy, tiny soaps, flowers...have fun!
What You'll Need:
Shrink plastic - opaque
Aleene's Super Thick Tacky Glue - 8 oz bottle
1/4" Paper punch if making the ribbon laced basket
Pencil
Oven or toaster oven
Scissors
Spatula
Hot pad
Baby powder
Moss, flowers, ribbon, candy, etc. to decorate basket
7-1/2" to 8" plate for pattern
Ruler
Cookie sheet
How to Make It:
1. PATTERN - Place plate on shrink plastic. Trace around plate with pencil. Cut a basket handle 3/4" x 10-3/4" from shrink plastic.
2. CUT OUT - Cut on inside of lines using scissors. If making basket with laced ribbon, use paper to punch holes every inch about 1/4" in from edges of circle and at the center of the handle.
3. SHRINK - Preheat oven to 275-300 degrees. Sprinkle cookie sheet lightly with baby powder. Lay shrink plastic designs on cookie sheet. Place in center of oven and watch it shrink - the shrink plastic will flatten when process is complete - this should take about 5 minutes. Remove one piece from oven at a time. Immediately shape around glue bottle. Hold until hard. Repeat procedure for other piece.
4. ASSEMBLE - To assemble basket, glue the handle to the inside of the basket. Decorate basket with moss, flowers, ribbon, etc. by gluing place. For ribbon basket, lace ribbon through holes and glue at ends. NOTE: If basket doesn't sit straight, shrink a small rectangle of shrink plastic and glue to bottom of basket.
Sunday, February 06, 2011
Makin' Mosaics at Heidi's Studio
What a great day! Four awesome former Aleene's co-workers gettin' together for some creative fun and catching up. Heidi and Denise hadn't seen each other in 11 years!!!

Jean, Denise and Heidi crafting away!

Jean's stepping stone had star appeal. She started with some plates she already had.


Denise choose a Mary Engelbreit theme for her stepping stone complete with little teapot accents.

As for me, I had four stunning plates a friend sent me a couple of years ago for a Christmas present and they arrived broken (I never did tell her...) and I finally made them 'whole' again. Can you see the dragonfly? I still have two more broken plates...

Denise gives Jean a little helping hand on her creation.

Great job ladies!!! Can't wait for our next BIG adventure!

Love ya, Heidi!!! And thanks for helping us express our creativity!!!

Some eye-candy in Heidi's Studio - all of the flowers were made from soda cans!!!
Jean, Denise and Heidi crafting away!
Jean's stepping stone had star appeal. She started with some plates she already had.
Denise choose a Mary Engelbreit theme for her stepping stone complete with little teapot accents.
As for me, I had four stunning plates a friend sent me a couple of years ago for a Christmas present and they arrived broken (I never did tell her...) and I finally made them 'whole' again. Can you see the dragonfly? I still have two more broken plates...
Denise gives Jean a little helping hand on her creation.
Great job ladies!!! Can't wait for our next BIG adventure!
Love ya, Heidi!!! And thanks for helping us express our creativity!!!
Some eye-candy in Heidi's Studio - all of the flowers were made from soda cans!!!
Thursday, February 03, 2011
Love Feast
It was my turn to host the newcomer's club gourmet dinner group so I decided to celebrate Valentine's Day a little early and have a Love Feast...(this was the first time the group has been to my house - before I moved five months ago my house was tooooo small to host any kind of gathering)
Yes, we can call people to invite them to a party or send an e-vite but I'm an old fashioned mail an invitation kind of girl (both of my parents worked for the post office for years). I made a quick invitation using Word with some fun hearts - make your invitation fun - it sets the tone for the entire party and gets your attendees excited in anticipation as to what the evening will hold.
Next was my menu (wish I'd gotten pictures - it was too hard to fix the entire meal and get photos too). We had yummy appetizer salads served in mini martini glasses. Then it was on to chicken wrapped in puffed pastry with, of course, hearts on top cut from puff pastry. We had root vegetable au gratin, fresh tarragon green beans, sundried tomato and basil rolls (thaw Bridgeford frozen bread dough and knead in the tomatoes and basil - yummers) and for dessert a chocolate cake with caramel sauce and a scoop of vanilla ice cream. Needless-to-say after all that I've added more walking to my to do list this week.
Carnations on my front door

I got my China out of storage (haven't seen them face-to-face in over six years) and added a vase of carnations for each of the guests to take home. I found the vases at the dollar store - they had LOVE written all over them. I also found cute Valentine's Day socks for a buck - they made great inexpensive favors - one person even put hers on right then and there. Yep, you'll notice the sliding door was open - the weather has been gorgeous!!!

Appetizer Salads in Mini Martini Glasses - I cut hearts from red peppers to add a 'loving' touch.
Wednesday, February 02, 2011
Happy Groundhog's Day
Sunday, January 30, 2011
2010 Costco International Photo Contest Winners
Monday, January 24, 2011
Valentine's Day

Hearts Afire
Check out other shrink plastic ideas at www.lulu.com
What You Need
Shrink Plastic
Heart hole punch, 1” across
1/8” diameter hole punch
Flat nose pliers
Jump rings, gold
Charms, assorted small hearts
Crystal candle holder
Clear plastic, non-shrinking
Permanent pen, red
Heart necklace charms with three holes along one edge and one along another edge
Scissors, small
Tea candle
Chain necklace for tea lamp
E6000® Craft Glue
What To Do
- Punch hearts from shrink plastic. NOTE: Candleholder: Punch 12. Tea Lamp: Punch 8, leaving ¼ between four punched hearts. Cut apart, leaving 1/8” around all edges, forming a heart within a square.
- Punch holes in center of hearts and one edge of each heart within a square for hanging, using small hole punch. NOTE: Tea Lamp: Do not punch holes in four hearts.
- Color with red pen.
- Tea Lamp – Glue chain to shade, leaving even drapes hanging below bottom edge (see photo). Let dry. Place jump ring on chain at center of each drape and add a charm. Evenly spacing shrunk hearts and heart within a square on chain. Glue hearts where chain is glued on shade.
- Candleholder – Cut clear plastic desired diameter. Cut center out with small scissors diameter of candle. Punch four holes equal distance around edge of plastic. Place shrunk hearts and charms on heart necklace charm, using jump rings. Place each on plastic circle, using jump ring. Place ring over candle in candle holder.
Wednesday, January 05, 2011
Aleene's Butterflies from Feathers
Hi Aleene's Fans,
I've seen a few posts regarding Aleene's Butterflies from Feathers and I have to admit, I don't know what that is. Please send me an email about what you're looking for and I can research it. It must go back further than when I was editing instructions at Aleene's Creative Living. Send an email to craftproducts@yahoo.com and I'll check into it and post the details on my blog.
Thanks!
Joan
I've seen a few posts regarding Aleene's Butterflies from Feathers and I have to admit, I don't know what that is. Please send me an email about what you're looking for and I can research it. It must go back further than when I was editing instructions at Aleene's Creative Living. Send an email to craftproducts@yahoo.com and I'll check into it and post the details on my blog.
Thanks!
Joan
Saturday, January 01, 2011
Happy New Year!
Wishing you a healthy, adventurous, fun, exciting and fulfilling 2011. Happy New Year!!!
Thursday, December 30, 2010
Confetti Hot Dogs

New Year's Confetti Hot Dogs
Are you looking for an unusual appetizer or main dish for your New Year's Eve dinner? Here's the ticket and it's healthy too!!! Grab some turkey or chicken dogs, some reduced-fat crescent rolls, the kiddos and bring on the new year in healthy style. Check out the recipe at
www.MakeHealthyFun.blogspot.com
Tuesday, December 21, 2010
You Know...
You've been doing too many spray adhesive projects when you release the spray nozzle and it comes off the can and sticks to your finger. That aside, I love working with the Aleene's Crystal Clear Tacky Spray.
I rescued this changing table a couple of years ago from my brother and sister-in-law's 'to sell pile'. I love the clear openings until I started using it in my bedroom and when someone would come into the room they could see ALL of the items in the drawers. So, I bought some inexpensive lace fabric, cut it to the size of each opening, sprayed on some spray adhesive and within minutes I had all of the drawers covered.
Before and now it's so much more feminine. You could use other things to cover the openings - I was even thinking beads, but the lace won out.
Tip - if your fingers get sticky from using the spray adhesive, spray on a little WD-40 - it's take it right off.
Joan
Sunday, December 19, 2010
Facebook Self Challenge
How to Make a Valance from Place Mats
I posted two challenges for myself yesterday on my Facebook page - I figured if I let my FB Friends know I'd be sure to get them done, after all, there were only two things on my list...then Mother Nature took over. You've probably heard about the heavy rains we're having in California - well, they interrupted my progress but I'm here to say that I achieved my two challenges, but it took a day longer.
My two goals were to finish the valances in my living room and to hang my photos over my couch. Both projects are done as of tonight.
I fell in love with these place mats from Pier 1 - I love leaves and the colors in the place mats are some of my favorite. I felt though, that I needed to add some green since my two chairs and couch were green. I had some leftover fabric from when I upholstered one of the chairs (I didn't really upholster it, I used safety pins to anchor it on the back - looks good to me!) I cut leaves from the leftover fabric and glued them on where I thought it looked good. I glued the place mats to the existing curtain rod with hot glue and since the place mats didn't quite fit the entire length of the curtain rod, I pleated a place mat (using hot glue to hold the pleats) and glued them on the end.
Oh yes, the whole Mother Nature thing that interrupted my self challenge...I received a call from my parent's renter that there was a leak and water was pouring in the house. We couldn't get a handyman out yesterday (he was too busy with leaks!) and when he worked on it today he couldn't find the source. When my parents were at my house dealing with the leak they got word a huge oak tree had fallen down and grazed the roof of their barn. Mother Nature, enough all ready...
Happy Crafting!
Joan
Photo Display
Here's a great way to display all of those photos you have!
I have TONS of photos I've taken and wanted to display them in my new home. Here's the outcome - first, I laid them out on the floor to get a feel for what they'd look like, then I took a photo of the layout to make sure I knew where each one went. That's good in theory, but check it out - I expanded on it as I went along to fill up the huge wall.
I started by having my photos enlarged at COSTCO - it's super easy - just upload them to their website and in an hour you can pick up your awesome enlargements (and they're cheap!).
I bought some foam core at a local discount store (it's available at craft stores too) and some Aleene's Crystal Clear Tacky Spray (I LOVE this product!).
I sprayed the spray adhesive on the back of the photo then placed it on the foam core and smoothed it with my hands - I'd recommend a brayer next time for a super duper professional look. Oh, don't forget to protect your work surface really well before you use the spray - follow the instructions on the can too.
I laid the photo on a cutting board and used a box cutting knife to trim around the edges (hint - use a new blade and change the blade often so you get a good cut).
To adhere the photos to the wall I used a 3M product that attaches things to the wall and doesn't leave a residue when removed.
My display is picture perfect, I'd say!
Friday, December 17, 2010
More Christmas Decorating Ideas
I had a few snow people that I'd been given over the years so I sprinkled them around my kitchen - on top of my vertical blinds (who knew there was a ledge on top?), put a snow couple on my fridge, but I wanted to keep the family theme going that I'd used in the living room, so I printed out a collage of past Christmas family photos and placed them in a vase.
Remember the Aleene's / Michael's Magic of Christmas television special and book? I so loved being a part of that - I am lucky enough to have one of the creations from it. The wonderfully matching quilt was made by my friend Kathi ages ago. It matches perfect! Thanks, Kathi!
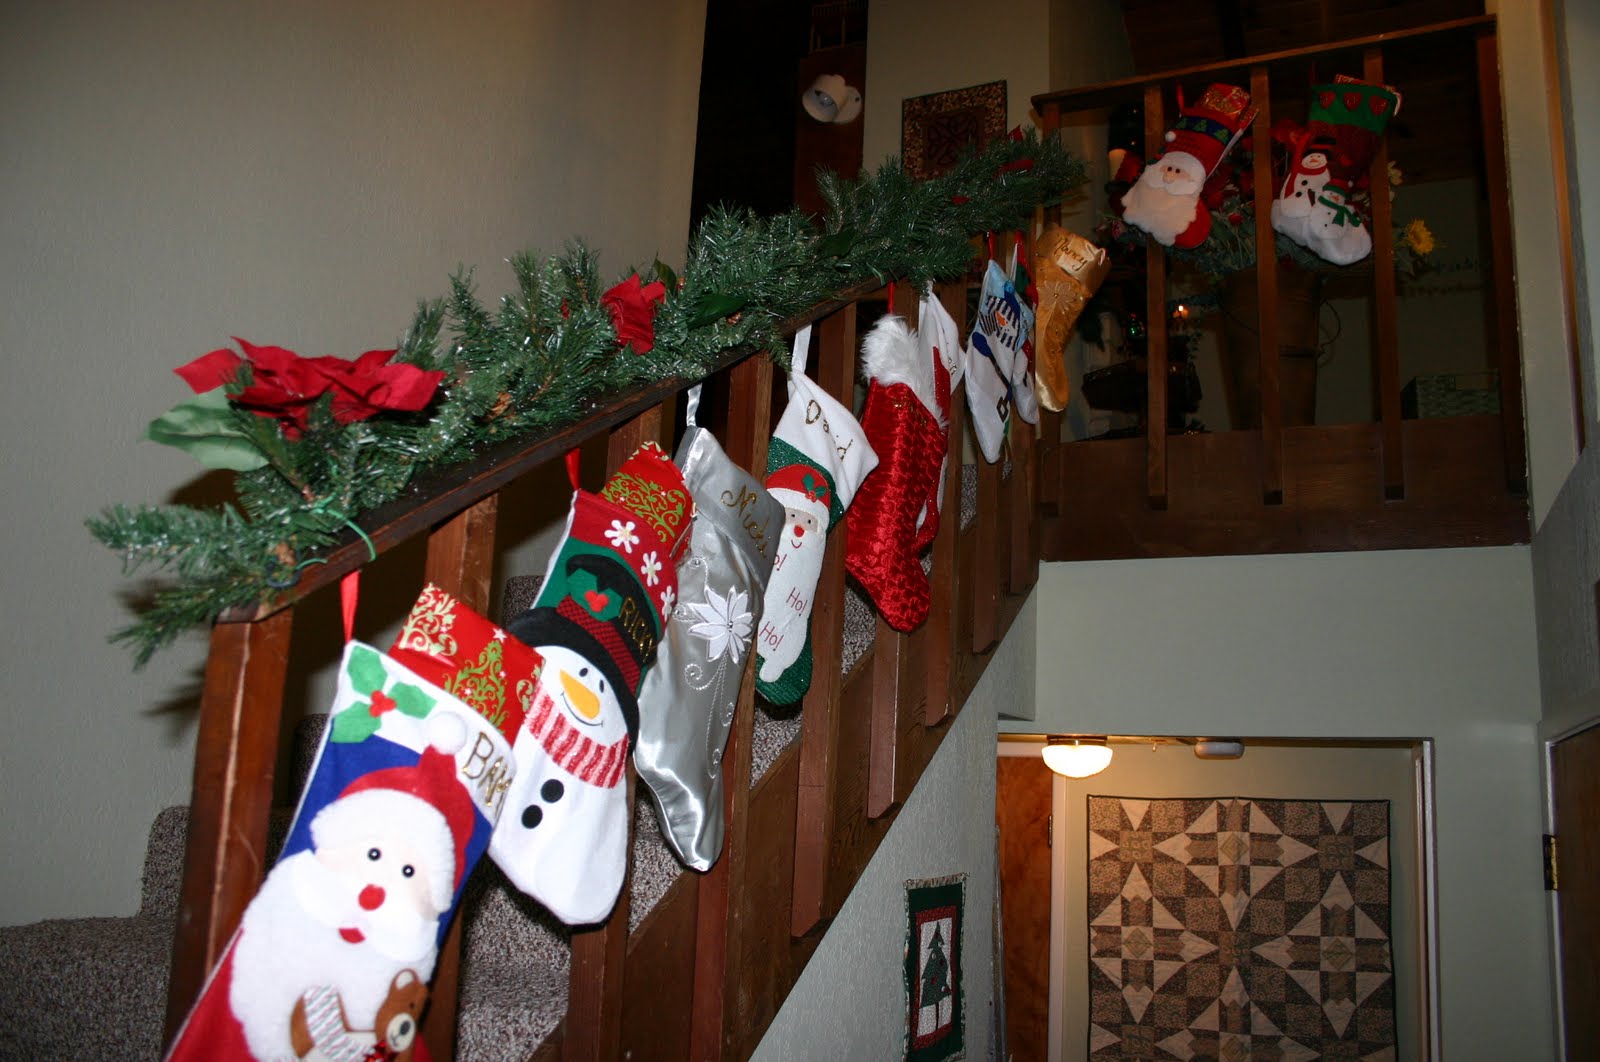
I love the dollar store!!! I was able to get these stockings for one dollar each and able to fill them with dollar store finds...I think no one is ever too old for a stocking!!! It brings wonderful color and festiveness to the stairs.
A friend had a great idea - a Christmas Sock Party. We were instructed to wear our Christmas socks to her home and what a colorful party it was. She had Chinese food waiting for us and I got an A from my friends on decorating my cookie 'platter'. We did some silly Christmas charades (ever hear of a movie The Lemon Drop Kid? - I had to act that out...)
My socks for the event.
Happy Holidays!
Happy Holidays!!!
Merry Christmas


If you've known me very long, you know that having worked in the craft industry for years and years that we pretty much live Christmas every month of the year. But, I have to admit, I haven't decorated for the holidays in a few years and haven't had the home to entertain. Things have changed - I moved into a larger home a few months ago, so this year I pulled out all the stops and started from scratch since I'd given most of my decorations to Goodwill a few years ago.
All of my eleven family members will be at my home this Christmas, so what better decorating 'theme' than Family. I knew I had to do it inexpensively so my crafty brain went into full gear and let me show you what I came up with - AND there's a special gift just for you at the end, so be sure to check out all of the ideas...
I started with my love of the color burgundy and added gold for a touch of elegance. I came up with the idea of little frames as ornaments and when everyone leaves they can take the photo home with them. You can find the mini frames at your local craft store or thrift store - don't worry if you can't find them all to match, that's half the fun and they can easily all 'match' with the same coat of spray paint.

I searched my photo archives from this last year and came up with photos of all of my family members - this was a unique shot from last month - it's my dad sitting in the driver's seat of one of his proud possessions - his Model T - I took the shot through the back window.

I tried to find 'activity' photos of each family member - this one is my nephew, Steven, who will be joining us from Washington, DC - he competed in his first triathlon this year. Oh, yes...Facebook is a great place to find 'activity' photos of your family and friends - just cut and paste them into a photo altering program or even a word processing program and print away.

I ran across these beautiful ANTIQUE postcards when I was at my parent's house. They belonged to my great aunt and are over 100 years old. I scanned them into my computer, printed them off on sturdy paper, cut them out, punched some holes near the top then tied them to the tree with burgundy ribbon - another way to bring family into your decorating. All I was out was the cost of the printer ink, the paper and ribbon.


My tree wouldn't be complete without the angel my mom made for me 25 years ago. She's in great shape (the angel and my mom!).

Once the tree was decorated, I moved on to the fireplace. Once again, I wanted to bring in family. I purchased the gigantic wreath at my local craft store for only $10, got some 60% off poinsettias and I had some gold ribbon. I printed off photos of my family members, mounted them on red foam sheets (I could have used burgundy paper but I didn't have any), then glued them on some printed scrapbook paper. I tucked the photos into the branches of the wreath and it's another take-away gift for my family.


Dollar Store Find!!! I have beautiful cathedral ceilings in the living room and kitchen and wanted something eye-catching. I purchased the bells and bows at the dollar store, tied them all together and used a push pin to hang them from the beam. Nope, no family here...I just like them.
I almost forgot...here's my gift to you (you'll see you get a bonus, one's for Thanksgiving). These are the same postcards I have on my tree. Print them to the desired size and use them for decorations, nametags on gifts wherever you want some vintage love - have fun and have a Merry Christmas.

If you've known me very long, you know that having worked in the craft industry for years and years that we pretty much live Christmas every month of the year. But, I have to admit, I haven't decorated for the holidays in a few years and haven't had the home to entertain. Things have changed - I moved into a larger home a few months ago, so this year I pulled out all the stops and started from scratch since I'd given most of my decorations to Goodwill a few years ago.
All of my eleven family members will be at my home this Christmas, so what better decorating 'theme' than Family. I knew I had to do it inexpensively so my crafty brain went into full gear and let me show you what I came up with - AND there's a special gift just for you at the end, so be sure to check out all of the ideas...
I started with my love of the color burgundy and added gold for a touch of elegance. I came up with the idea of little frames as ornaments and when everyone leaves they can take the photo home with them. You can find the mini frames at your local craft store or thrift store - don't worry if you can't find them all to match, that's half the fun and they can easily all 'match' with the same coat of spray paint.
I searched my photo archives from this last year and came up with photos of all of my family members - this was a unique shot from last month - it's my dad sitting in the driver's seat of one of his proud possessions - his Model T - I took the shot through the back window.
I tried to find 'activity' photos of each family member - this one is my nephew, Steven, who will be joining us from Washington, DC - he competed in his first triathlon this year. Oh, yes...Facebook is a great place to find 'activity' photos of your family and friends - just cut and paste them into a photo altering program or even a word processing program and print away.
I ran across these beautiful ANTIQUE postcards when I was at my parent's house. They belonged to my great aunt and are over 100 years old. I scanned them into my computer, printed them off on sturdy paper, cut them out, punched some holes near the top then tied them to the tree with burgundy ribbon - another way to bring family into your decorating. All I was out was the cost of the printer ink, the paper and ribbon.
My tree wouldn't be complete without the angel my mom made for me 25 years ago. She's in great shape (the angel and my mom!).
Once the tree was decorated, I moved on to the fireplace. Once again, I wanted to bring in family. I purchased the gigantic wreath at my local craft store for only $10, got some 60% off poinsettias and I had some gold ribbon. I printed off photos of my family members, mounted them on red foam sheets (I could have used burgundy paper but I didn't have any), then glued them on some printed scrapbook paper. I tucked the photos into the branches of the wreath and it's another take-away gift for my family.
Dollar Store Find!!! I have beautiful cathedral ceilings in the living room and kitchen and wanted something eye-catching. I purchased the bells and bows at the dollar store, tied them all together and used a push pin to hang them from the beam. Nope, no family here...I just like them.
I almost forgot...here's my gift to you (you'll see you get a bonus, one's for Thanksgiving). These are the same postcards I have on my tree. Print them to the desired size and use them for decorations, nametags on gifts wherever you want some vintage love - have fun and have a Merry Christmas.

Subscribe to:
Posts (Atom)