Showing posts with label Tulip Soft Fabric Paint. Show all posts

Thursday, August 06, 2009

Strawberries!!!


Strawberry Table Runner

I LOVE strawberries and never knew what to do with the empty baskets - I got the idea to cut them apart and make a stencil for a creative table runner!

What You'll Need
Table runner, 100% cotton
Strawberry basket
Scissors
Newspaper
Tulip Soft Fabric Paint - Matte Berry Red, Holiday Green
Tulip Fabric Spray Paint - Neon Green
Rubber stamp with strawberries
2 Make-up sponges

How to Make It
1. Prewash the table runner to remove sizing. Do not use fabric softener in the washer or dryer. Place newspaper on work surface.
2. Cut basket into sections. Lay across table runner.
3. Shake Neon Green spray paint. Spritz on table runner, carefully moving basket sections as needed around table runner. Let dry.
4. Dab make-up sponge into Berry Red paint. Dab on strawberry sections of stamp. Using a second make-up sponge, dab into Holiday Green and dab on leaf sections of stamp. Press stamp firmly and evenly on table runner. Remove. Apply paint for each stamping. Let dry.

Tuesday, November 11, 2008


Harvest Table Runner


This touch of Autumn is easy to achieve and will look great on your table!


What You'll Need
Tulip Soft Fabric Paint: Chocolate, Golden Tan, Olive, Sunshine Yellow
Stamp, oak leaf
Garbage bag
Table runner, 100% cotton
Sea sponge
Foil
Paintbrush, foam


How to Make It
1. Prewash table runner to remove sizing. Do not dry, leave damp. Cover work surface with garbage bag. Lay damp table runner on garbage bag.
2. Place a puddle of each color of paint on foil. Dab damp sponge in one color. Dab a random pattern on table runner. Rinse sponge. Repeat for each color of paint. Add more water and paint until desired watercolor look is achieved. Let dry.
3. Brush Chocolate on stamp, using foam paintbrush. Stamp four leaves in center of table runner, re-applying paint after each stamp. Stamp leaves in corners. Let dry.

That's all there is to it!

Friday, May 02, 2008

Traveling in Style

Dramatic Travel Accessories
These amazing projects make me want to get out a map and start thinking about my next trip. How about you? Is your next trek to Tuscany, San Diego, Santa Barbara, the ocean, the desert...no matter where you go, you'll be lookin' mighty fine toting these dramatic pieces.

They were created by Cheryl Ball with Tulip Flocked Iron-Ons, sparkling Tulip Glam-It-Up! Iron-On Glass Crystals and Tulip Soft Fabric Paint. You'll be amazed how quickly these accessories from http://www.organize.com/ can be transformed into amazing travel accessories. Find out how to make these beauties at www.duncancrafts.com


Enjoy dreaming about your next travels, I know I will.
Joan

Thursday, April 10, 2008

Organize It!!!

Share Your Organizing Tips

Would your closet just love the organizer set we're featuring? Well, share your favorite techniques, tips, products, anything and everything related to crafting with Tulip and Aleene's products and you could be the lucky recipient of this decorated Organize.com closet set. Send us your tips and we'll review all the messages we receive with our technical experts to make sure that each tip will be problem-free for you. Then we pick the lucky recipient for the closet set.
How to Enter
Send your entry to editor@duncanmail.com
Please reply in 100 words or less. Give your full name and COMPLETE MAILING ADDRESS so we can send the prize award to you! Entries without mailing addresses will not be considered. We promise not to publish or sell your name. Submission of messages constitutes consent to use writers' names and messages for editorial, advertising and publicity purposes without further compensation (except where prohibited.)

Tuesday, April 01, 2008

organize.com

Organize in Style
This is MY kind of project!
Ready to get your closet organized? Check out how to make these polka dot organizers painted with Tulip Soft Fabric Paint.
The organizing products are available at http://www.organize.com/

Tuesday, December 18, 2007

What do you give a guy who has everything?
My brother loves old rusty things, lives on the 40 acre family farm and is really hard to buy gifts for.
This present really came by mistake - I was at the family farm taking pictures of leaves for a gift for my mom (she really, really loves leaves - AND so do I!). I thought about taking photographs of interesting leaves, but thought it would have so much more meaning if they were leaves that she saw every day. As I was out taking leaf pictures, I noticed that a board on the barn had a cutout of some kind that looked like a D - that's where I lost all track of time (my mom actually came out to make sure I hadn't fallen in the well - there's actually no way to fall in the well, but it sounds good...I am a writer, after all!). So, I started looking around to spell out my brother's name in things around the farm. The A is some kind of a hitch the V is an inverted saw horse, the I is actually (I'd have to clarify this with David after Christmas) that it's from a Model T and the other D is a tractor seat. I really had fun doing this. So, let your imagination run free and sometimes don't think so hard about that perfect gift and it will just come to you as if it was written on the side of a billboard - in my case on the side of the barn! It was inexpensive too!
David's Rusty Old Stuff Wall Art
Here's What You Need
Aleene's® Crystal Clear Tacky Spray™
Aleene's® Original Tacky Glue™
Tulip® Soft Fabric Paint™ (color to match wood)
Foam paintbrush
Photos
Old wood for background
Picture hangers and hammer
Chipboard (size of photos)

Here's How to Make It
1. Attach picture hangers on back of wood.
2. Paint edges of chipboard with Soft Paint. Let dry.
3. Spray Tacky Spray on front of chipboard. Press on photo. Repeat for all photos.
4. Glue photos on front of wood.

Make It Yours! Tip
Think of what the person really likes - is it candy, is it office supplies (that could be fun!), is it pictures of the kids (have them form the letters with their bodies or hands!)???

Wrap It Up! Tip
I think I'm going go hang this out in David's workshop or maybe I'll wrap it in a burlap sack...

Tuesday, December 11, 2007


Gift Giving Idea

Beaded Frame
Simple, quick, inexpensive, bright, bold - an expression of you!
Here's What You Need
Tulip Soft Fabric Paint - color desired
Aleene's Thick Designer Tacky Glue
Brush, 1" wide foam
Beads, wood in all shapes and sizes
Frame, unfinished wood
Here's How to Make It
1. Paint frame.
2. Glue beads on frame, working on one side at a time.
Make It Yours! Tips
Choose a color from the photo or the room the frame will be in - that way, it looks fabulous! Choose really small frames and beads and make them as ornaments for all the grandparents!
Wrap It Up! Tip
When you wrap the frame, include several other photos so the receiver can change them throughout the year.


Saturday, December 08, 2007


Gift / Get Organized Idea
Decoupage File Cabinet
File In Style

Let your creativity spill into your office - decoupage a poster or fabric onto an inexpensive file cabinet.

What You Need
Tulip® Soft Fabric Paint™, colors to coordinate with poster
Aleene’s® Instant Decoupage™ Sealer & Finish
Poster large enough to fit front of file cabinet
Scissors
File cabinet
Iron
Foam brush
Sponge

How to Make It
Cut poster to fit fronts of drawers.
Brush Instant Decoupage on front of one drawer.
Place poster piece on Instant Decoupage. Smooth with your hands. Brush Instant Decoupage over poster. If air bubbles appear, poke with pin and smooth by rubbing finger over it and applying more Instant Decoupage. Repeat for other drawer.
Sponge paint sides and top of file cabinet with Soft Paints. Let dry.
Brush Instant Decoupage over paint to protect surfaces.

Make It Yours! Tip
Posters are available in all kinds of different motifs – find one that is just perfect for you or the person you’re giving the file cabinet to.

Wrap It Up! Tip
Fill the file cabinet with file folders, labels, pens, pencils and all kinds of different organizational finds from your local office supply store. Add a bow to the top of the file cabinet and let it speak for itself!

Sunday, December 02, 2007

Picture Frames
The perfect gift for everyone
What You Need
Wood frame
Tulip® 3D Fashion Paint
Tulip® Soft Fabric Paint
Aleene's® Original Tacky Glue™
Wood shapes of your choice (hearts, stars, circles, triangles, etc.)
Paintbrushes: various
Tape for checkerboard

How to Make It
1. Paint frame desired color. If you want the checkerboard look - use tape to divide off sections before you paint.
2. Paint the wood pieces. Layering different colors and shapes looks awesome! Let dry.
3. Glue and layer wood pieces to frame.
4. Add squiggles, dots and personalize with 3D Fashion Paint. Let dry.

Make It Yours Tip!
Paint the frame in the person's favorite color (school colors make a great checkerboard frame!), add wood pieces that fit the person - megaphones and mascots for a cheerleader, airplanes for the plane enthusiast - check out the wood aisle of your craft store. Stamps work great too!

Let them make their own custom picture mat - Include the mat, some decorative scrapbook paper and a can of Aleene's® Crystal Clear Tacky Spray™.

Wrap It Up Tip!
Wrap the frame add a bow and actually place it on the wall. It's a decorative touch to the room and a gift all in one!

Tuesday, November 27, 2007

Tick Tock Timeless Treasure
It's quick. It's easy! You can make this adorable clock in a matter of minutes and mark it off your Christmas gift list!

What you need
Tulip® Soft Fabric Paints™ - two colors to coordinate with your fabric - one dark and one light (even though the name is fabric paint, you can use it on all your projects!)
Aleene's® Crystal Clear Tacky Spray
Aleene's® Original Tacky Glue
Wood piece with hole for clock movement or drill hole
Foam brush
Sponge
Fine line permanent pen (black)
Fabric of your choice
Craft knife
Clock movement with hands (make sure the stem is long enough to go through wood
4 wood hearts
Scissors

Here's how to do it!
1. Paint sections of wood piece that will not be covered with fabric, using dark paint color. Paint hearts same color. Let dry. Sponge lighter color of paint over painted sections of wood piece. Add dots around edges of small hearts, using permanent pen.
2. Cut shape from fabric to fit wood piece. Spray Tacky Spray on back of fabric and smooth on wood piece. Cut hole for clock movement through fabric with craft knife. Position clock in place through hole, following manufacturer's instructions.
3. Glue wood hearts in position on clock, using Tacky Glue. NOTE: Place hearts so clock hands do not scrape them.

How to Make it Yours (or a perfect for that special someone) - Make the clock extra special by picking fabric and wood pieces that speaks to you about the person. Personalize with Tulip® 3D Fabric Paints™ and you can add 3D Paint numbers instead of using wood hearts.

Enjoy!

Wednesday, November 21, 2007


Celebrate Thanksgiving
with plates and napkins you've stamped yourself!
Easy, Easy, Easy Thanksgiving Tableware
You can zap an entire tablesetting in just a few minutes - it's inexpensive too!
What you need
How to do it!
1. Squeeze out a small amount of fabric paint on a plate.
2. Dab cosmetic sponge into paint. Dab paint on stamp.
3. Press stamp on napkin or plate.
Taaaadaaaaa! You're done!
Make it Yours Tip - This idea can be for any occasion - Christmas, birthdays, Valentine's Day - and don't forget - every day is special - CELEBRATE!

Thursday, November 08, 2007

Into the Jungle

With the holidays right around the corner, I've been thinking about gift ideas. I love the challenge of coming up with gifts that are just right for everyone on my gift list. I really, really, really love gifts that make an impact, speak to the person I'm giving it to, it has to be within my limited budget AND it has to be quick and easy!

With all those criteria in mind, I found these incredible monkey napkin rings at Pottery Barn - they are sooo cute and so very applicable for my friend.

Into the Jungle Napkins and Napkin Rings

Here's what you'll need
Tulip® Soft Fabric Paint™, Olive
Napkin rings
Cloth napkins
Stamp, leaf
Sponge brush or cosmetic sponge
Iron - optional

Here's what to do
1. Prewash and dry napkins to remove sizing. Do not use fabric softener. If needed, iron to remove wrinkles.
2. Dab Fabric Paint on stamp with sponge brush or sponge. Press on napkin where desired. Let dry. May be washed after 72 hours.
You're done!
Giftwrap Tip: I'm going to wrap with brown paper bag tied with raffia!
Other Gift Ideas: I'm full steam ahead into holiday gift making - be on the lookout very soon for how-to instructions on a Crystal Encrusted Wine Stopper - it's a real show stopper!, an interesting personalized photo display - you won't want to miss this! It's something you can make for EVERYONE on your gift list!, more Glade Flameless Candle ideas - all the supplies are on my kitchen table, just waiting for me to get started - and I CAN'T WAIT! Check back soon for these ideas and many other giftables.

Thursday, November 01, 2007

FABRIC STIFFENED DOILY BOWL


Retro is back!!! My mom and I went Christmas shopping this weekend and I was amazed to see fabric stiffened bowls in the stores! I made them a zillion years ago and they're here again.


Are you ready to hear how easy these are to create?


Fabric Stiffened
Doily Bowl

Materials needed
Aleene's® Fabric Stiffener and Draping Liquid
Tulip® Soft Fabric Paint™, Chocolate
Doily (found them at my dollar store!)
Zip top plastic bag
Bowl or something to form doily over
Plastic wrap
Embellishments

How to make it
1. Smooth plastic wrap over bowl.
2. Place doily in zip top plastic bag. Add a little Fabric Stiffener and a small amount of Soft Paint. Close plastic bag. Squish the doily around to saturate with Fabric Stiffener and paint. Add more Fabric Stiffener and paint as needed to cover.
3. Remove doily from bag and smooth over bowl. Remove excess Fabric Stiffener by dabbing it with a paper towel. Crumple plastic wrap and place in areas where you want dimension like along an edge so it's wavy.
4. Let dry. Remove from bowl. Decorate as desired.

Fill your fabric stiffened bowl with silk flowers, candy - whatever for the season. This makes an awesome thank you or hostess gift for Thanksgiving! This technique also works with fabric, napkins, handkerchiefs, etc.


Saturday, October 13, 2007

Craft Challenge at the Fair!!!
What a hoot I had this afternoon - I volunteered to do a Craft Challenge in the Home Arts Building at the fair and it was so much fun!


There were two teams and we each had the same box of craft goodies to choose from. We did two challenges and both times guys volunteered to be my partner. Tony, my first partner, was egged on by his six year old son. Tony picked a tin and decorated it with the Tulip Boho Appliques for Halloween, then he went for the Tulip Fashion Glitter - he couldn't get enough of that. When we still had time on the clock he opened up the tin and added fabric on the inside along with fluorescent colored wiggle eyes. Great job Tony!

In the second competition, my partner was Jason - he did an awesome job! He selected a clay pot from our box of goodies - he went to town decorating it with Tulip Fashion Glitter for grass, added some flowers with Tulip Soft Fabric Paint and even added a wiggle eye sun. Jason is one creative dude.

Thanks to Lindy who got all of the supplies together (and asked me to volunteer) and Alee the designer on the other team. Alee's mom was there taking pictures and she promises to get me some soon so I can post them here.

I took a few minutes before the competition to check out the creative side of the fair - I couldn't believe the floral arrangements - the pink object with gladiolus is one of those foam pool toys, one even included paintbrushes as accents and one arrangement had Slinkies!!! A+ for thinking outside of the box.

Thursday, July 05, 2007

Crafty Room Makeover!!!

OK, I had company coming two weekends in a row - so I challenged myself to spruce up my guest bedroom on a tight budget.

I already had the Caribbean Blue bedspread and brown and blue pillows, but nothing on the walls and dustbunnies on the bedside table.

I ran across the drawing of a sandal I did a couple years ago when I was 18 and the paper was pretty crumpled. I decided to tear around the edges to remove the torn section. I knew I wanted to frame it and it needed some color to draw it into the room colors. I brushed water on a piece of Vellum paper and sprinkled on Tulip Soft Fabric Paint that I'd watered down a little. It was fun to watch it spread and have no control over what it did. The white showed through too much, so I watered down the Chocolate paint and did an antiquing wash over the whole sheet. I let it dry and applied the sandal drawing with some Aleene's Original Tacky Glue. It is so much better to have a home for my little sandal instead of in a roll in my closet.

So, the room still needed some pizazz. I found this braided rug for $4 and decided it just needed to be cut in half and used as a valance over the vertical blinds. I ran a line of Aleene's Fabric Fusion along the cut edges to keep it together.

I found the great Caribbean Blue candle, large tropical leaf and glass sprinkles at my local craft store to add a little more color. Later, I added a beautiful picture of the Hawaii coastline to the table.

Perfect! And within my budget too!

Monday, April 16, 2007

I've been crafting...

and it feels sooooo good! I've been itching to get some crafting in and well, I just plain ol' made the time and it was wonderful!
I've always been one to organize my tax papers throughout the year (OK, in a previous life I did work for the IRS for 5 years!) - I always keep a file folder in a convenient place to just drop the papers in as I get them. This year I decided to make my "holder" a little more fun and pleasing to the eye. I found the cool wood box at my local craft store and wanted a wash look, so I added water to Tulip Soft Fabric Paint and brushed it on. I wanted a soft look to my photo, so I tore the edges, but didn't like the white, so I painted them with Copper paint. I adhered my photo to the box with Aleene's Thick Designer Tacky Glue. It's so much nicer than an ordinary file folder. Ahhhh, now to start saving money...
I'm getting ready for my vacation and want to take along a journal. I just couldn't stand the plain cover, so I tore around the edges of my photo and glued it in place on a purchased journal. Now, I have my feather pen and I'm ready to let my thoughts out. Just a few more days...
Then, (yes, I crafted a lot this weekend) it was my sister birthday and being the thrifty person I am, I wanted to wrap her gift in something useful and save by not buying wrapping paper. Her gift was her name spelled out in ceramic letters. We're always reminding each other to remember to play so I found the sand bucket at my craft store for only a dollar and added a large flower and bow.
I even got some ceramic painting in this weekend. Whoosh, I had so much fun and I vowed to craft more often.
Make it a great week!
Joan

Tuesday, April 03, 2007

Spring in to Spring!


My oh my! Did I have a fantastic day on Saturday - I got to see beautiful model homes, learn how to make a bow and watch my extremely talented friend Doug Alves create!
He made a fabulous placesetting using the Tulip® 3D Fashion Paint™ and Tulip® Soft Fabric Paint™. He used a stencil and the Soft Paint to paint the flowers and then accented them with the 3D paint. For added flair, he decoupaged daffodil giftwrap paper on a clear charger plate. I was so impressed!

Sunday, October 29, 2006


A party...a speed bump...bummer!
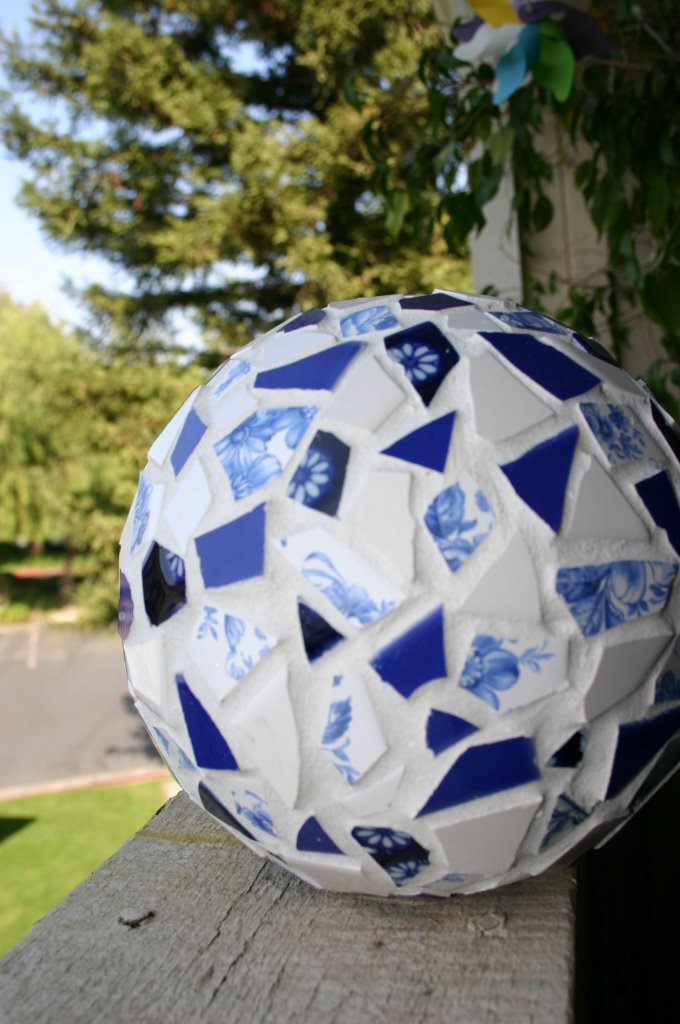
Well, last weekend I was on my way to a party in a neighborhood I'd never been in before. I was running late and took a speed bump a little too fast...I'd been carting around a couple ceramic spheres I was going to do mosaics on for Christmas presents. Yep, they broke! Bummer!

Aleene's Patio & Garden Outdoor Adhesive came to the rescue! I was able to glue the spheres back together and then apply the mosaic and grout to them. I also used the Patio & Garden Outdoor Adhesive to apply the mosaic pieces and then, remember, the old Aleene's recipe for grout that Darsee and Pattie used? I'll post the recipe soon. You can find very fine sand at your local home improvement store. You can even tint the grout with Tulip Soft Fabric Paint to get the perfect color to coordinate with your mosaic pieces.

I have two more spheres to complete by Christmas so I'll keep you posted on the progress.

Oh...the party was excellent - my friend and his wife roasted a turkey and other friends brought yummy side dishes!

Joan