Tuesday, February 26, 2013

Travel Watercolor Journal

Have your watercolor supplies always at the ready whether you're at home or traveling the world.  If you can't find a notebook to your liking, cover a blank one with cool fabric.

On-the-Go Watercolor Journal

What You'll Need

  • Notebook with a slot to add watercolor paper
  • Embellishments - I found the chair in the scrapbooking section, 12" 1/2" wide ribbon
  • Watercolor pad that will fit into notebook
  • Watercolor cakes
  • Brushes
  • Aleene's Tacky Glue
  • Old T-shirt
  • Scissors

How to Make It

1. Glue embellishment to outside of notebook. Let dry.
2. Cut ribbon in half. Glue each piece inside notebook along the edge. Cut around t-shirt pocket. Glue to inside of notebook to hold your supplies. Let dry.
3. Place watercolor pad into slot of notebook. Fill the pocket with your supplies and you're ready to paint!


Tuesday, February 19, 2013

How to Make a Birdfeeder from an Old Record


Paradise for Rockin’ Robins
Use old scratched records for this tweet birdfeeder

Design by Joan Martin Fee

Supplies

Gloves, cotton
Oven
Pot holders
2 Records
Drinking glass
Glass pie plate
Chain, small links
Crop-a-Dile™
S hook
Bird seed
Needle nose pliers
Wire cutters
Ruler


Directions

1. Preheat oven to 200 degrees. Place glass upside down in oven. Place record over glass form. Heat for 3-5 minutes. Ovens vary, so keep an eye on it. Wearing cotton gloves and using hot pads, remove record from oven when it is pliable and let record cool on glass. 
2. Place pie plate in oven, right side up. Place second record in pie plate and when pliable, push into pie plate with gloved hands.  Remove from oven. Let cool.
3. Punch three evenly spaced holes along edge of large record bowl, using Crop-a-Dile. Punch six evenly spaced holes along edge of small record bowl.
4. Cut 3 pieces of chain 12” long and 3 pieces 8” long. Open link on one end of 12” length chain using needle nose pliers and insert in hole in large record bowl. Repeat with other two 12” lengths in remaining openings.
5. Open opposite ends of chain and insert in every other hole of small bowl.
6. Insert 8” lengths of chain in small bowl.
7. Combine loose ends of 8” lengths together and use S hook to hold together.
8. Add bird seed and send out the invitation.

For more great ideas on how to use old, scratched records, check out Cheryl Ball and my e-book Get Those Old Records Off the Shelf at http://www.lulu.com/shop/joan-martin-fee-and-cheryl-ball/get-those-old-records-off-the-shelf/ebook/product-4670569.html

Tuesday, February 12, 2013

Valentine's Lunch Recipes

Whatever age your sweetie is, they'll love this special lunch you make for them.  It's super easy and is sure to bring a smile to their face.  You probably have all the ingredients in your kitchen right now.

Valentine's Lunch

What You'll Need 
Bread
Eggs or sandwich meat
Hummus, purchased
Carrots
Cookie cutter, heart shaped or use knife
Mayonnaise, light
Tomato soup
 
 How to Make It
Sandwiches and Croutons - For egg salad sandwiches, hard boil eggs and let cool. Remove peel. Chop and add a little mayonnaise. Season to taste. Place bread on cutting board and cut into heart shapes using knife or cookie cutter. Spread egg salad or use sandwich meat on bread. Croutons - Cut small heart shapes from excess bread. Toast in oven or pan until brown and crispy.
Hummus - Take a large spoonful of hummus and place on plate. Take another spoonful and place next to first scoop.  Form into heart shape with spoon.  Add carrots.

Monday, February 11, 2013

Add a Little Special to Every Day

I made empanadas for a party last Friday and since I can't just do ordinary, I cut hearts from the extra dough and added them for a special touch.

Make today special...

Wednesday, February 06, 2013

Shrink Plastic Heart Earrings

Valentine's Heart Filigree Earrings

Shrink plastic can be found at your local craft store.  It's a super fun product for the entire family.


What You Need

  • Shrink plastic
  • Baking sheet
  • Baby powder
  • Oven or toaster oven
  • Scissors
  • Hot pad
  • 2 fish hook ear wires
  • 6 (6mm) jump rings
  • ¼” hole punch
  • Needle nose pliers
  • Pencil


 What To Do
  1. For each earring, cut a 3-1/2” x 4-1/4” piece of shrink plastic. Fold plastic in half. Crease will disappear when shrunk.
  2. Lay folded plastic over pattern. Trace pattern using pencil. NOTE: Shaded areas on pattern will be cut out and discarded. Cut out design following pencil lines (excess lines can be erased before shrinking).  You have two pieces, the outer heart and the inner heart with filigree design. Open design and use a paper punch to make holes where indicated on pattern.
  3. Preheat oven to 275-300 degrees. Lightly sprinkle baking sheet with baby powder and place plastic pieces on baking sheet. Place in oven. When flat, remove from oven with hot pad and let cool.
  4. Attach jump rings and fish hook ear wires to hearts, using needle nose pliers.

Tuesday, January 29, 2013

Target Bag Flowers


What do you do with all those holiday shopping bags?  Make flowers with them, of course!

Plastic Bag Flowers

Materials needed
Plastic bags, color for flowers and green
Straw
Cotton swab
Scissors

Directions
Cut cotton swab and straw in half. Cut green bag into ½” x 6” pieces. For each flowers, cut a 6” square of plastic bag. Fold in half. Fold in half, again forming a square.  Place cotton swab in center of square with swab end up and twist plastic bag around it. Place in straw. Cut around plastic bag to form circle. Tie leaf strip around straw.

Tuesday, January 22, 2013

Tuesday, January 15, 2013

What a sweet way to remember a special year (or occasion) with this adorable time capsule you make yourself!


FYI - this project is from the Aleene's Creative Living archives so some products may not be available. Substitute good quality products and you'll create a great project.

Tuesday, January 08, 2013

Wood Burning Projects

Was your New Year's resolution to organize your recipes, control your kid's treasures or frame your favorite photos?  Do it in a unique and very personal way with wood burned words.


Saturday, January 05, 2013

Decorate a Piggy Bank

Is one of your new year's resolutions to save money?  Even those pennies and nickels add up.  Here's an adorable way for anyone and everyone in the family to save in a creative way.


What You'll Need
Piggy bank
Napkin, one with a fun print
White glue
Brush, wide
Paint for detail, optional
Scissors

How to Make It
1.  Remove the non-printed plys of the napkin and discard.
2.  Cut out designs from napkin.
3.  Brush glue in the area where you'll place one piece of napkin.  Place napkin piece over glue. Brush with glue.  Continue with all pieces. Let dry.
4.  If desired, add details like eyes and nose with paint.

Friday, December 28, 2012

New Year Inspiration

Have you seen the peel and stick quotes in stores or catalogs?  Well, here's an inexpensive way to create your own wall art in a matter of minutes.


Find your perfect quote.

Type the words into a word processing program.  Select the color and size font that fits perfect in your room.

Print it.

Cut it out.

Attach to wall with tiny amounts of stick glue so you can remove it when you want a new quote.

My walls are super textured so I knew if stenciled on a quote it wouldn't look good.  And this way too, I see I need to tweak the e a little so I can easily peel it off, apply a little more glue and be 100% happy with it.

Thursday, December 27, 2012

New Year's Eve Party Hats

I'm dusting off the old Aleene's Creative Living archives for these great party hats for your New Year's Eve celebrations!

Glittered Workout Wear

Whether it's New Year's Day or a regular day, look great when you're workin' out!  Heidi Borchers designed this many years ago but it still would be the hit of your exercise class!

What You'll Need
Aleene's Flexible Stretchable Fabric Glue
Glitter, washable
Chalk pencil
Leotard
Belt, if desired 

How to Make It
Prepare the Leotard
Wash and dry the leotard following manufacturers laundering instructions.

Pattern
Draw two sizes of stars and cut out.  Place on leotard and trace with chalk pencil where desired.

Apply Glue
Cut a tiny hole in glue tip. Trace stars with glue. Sprinkle on glitter.  Let dry.  Remove excess glitter.

Care of Leotard
Do not wash for at least a week to make sure glue cures. Treat as a fine washable by turning inside out and washing in a gentle cycle.  For best results, hand wash and hang to dry.

Saturday, December 22, 2012

Grandma's Linen Pouches

Need a last minute wrapping idea or one that has a special touch?  These pouches are perfect for slipping a gift inside and give a little bit of yourself or grandma too.  Made from old linens, this project is sure to be cherished by one and all.

Sunday, December 02, 2012

Tissue Paper Art

Heidi Borchers, the daughter of Aleene from Aleene's Creative Living Television Show and Magazine taught a group of us how to make this really cool graffiti paper using tissue and paint!  This frame is going to be a gift for my nephew - think a 17-year-old will like it?

Monday, November 26, 2012

Michaels Trimmings for the Christmas Tree

I created these super easy ornaments way back in 1997 and they're still in vogue today.  You'll have plenty of amazing trims to choose from at Michaels and everything else is there to create stunning trimmings for your tree.


Monday, November 19, 2012

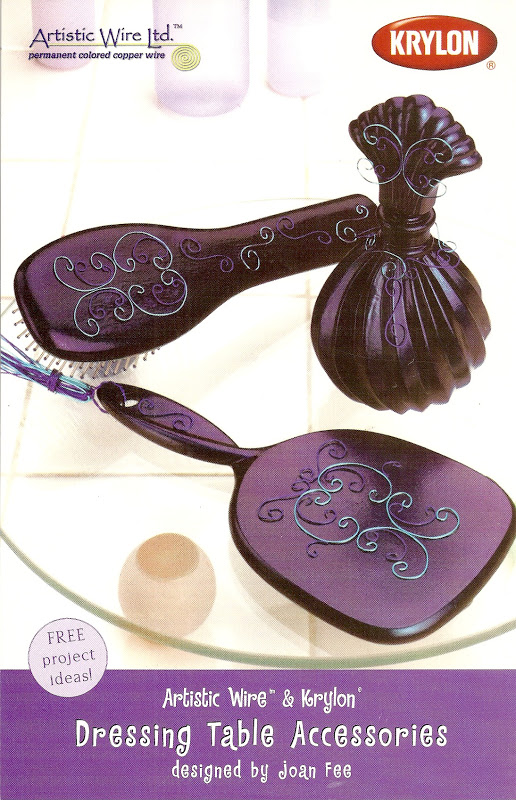
Krylon & Artistic Wire Dressing Table Accessories


Another favorite project from my past from Aleene's Creative Living.  Check out the bargain bin or dollar stores for brushes, mirrors and perfume bottles to decorate in your favorite colors.

Tuesday, November 13, 2012

Aleene's Archive Decoupage Footstool


I so loved making this project!!!  (Looks like I made it way back in 1997!)  Find a paper print (napkins, gift wrap paper or a poster will do) and apply away.  Use your favorite high-quality acrylic paints to match your papers and this will be ready to accent your livingroom tonight.

Wednesday, November 07, 2012

Aleene's Vintage Instruction Sheets

  
I was doing a little closet cleaning and ran across a HUGE binder filled with 350 (yes, I counted them!) Aleene's instruction sheets.  It's time to share these amazing projects with others so here's your chance to be the proud owner of years of Aleene's Creative Living history.  The projects are holiday and everyday so there's certainly a lot of crafting territory covered! Please contact me if interested and we can iron out the details.


Fused Glass Daisies & Cheese Plate

  
I have so enjoyed my fused glass classes / workshops - this meant stepping outside the box and trying something new (and exciting!)

This cutie dish will make its way into my newly established cobalt blue bathroom.
  
A few of us in the open workshop realized we were all making the same thing inspired by a local glass shop.  This will become a cheese plate for a very dear friend.  I'll add bumpers on the bottom and I bought a little cheese knife that I'll glue on some little glass pieces I fused.  This piece was totally made from scraps of glass.


What a great experience - I highly recommend trying something out of your comfort zone and fused glass.